Introduction to the Rat Tail Comb
The rat tail comb is a hairstyling workhorse that gets its name from its distinctive design. It features a long, thin handle that tapers into a fine-toothed point – resembling, you guessed it, a rat’s tail! This unique shape makes it a versatile tool for a surprising range of styling tasks.
Why It’s Essential
Here’s why the rat tail comb deserves a spot in your haircare arsenal:
- Precision Parting: The pointed tail is perfect for creating clean, straight hair parts. Ideal for sleek, polished looks or sectioning hair before braiding.
- Sectioning Power: Whether you’re dyeing, highlighting, or styling specific areas, the rat tail comb allows you to isolate sections of hair with ease.
- Backcombing and Teasing: The fine teeth help you add volume by gently backcombing or teasing hair. This is perfect for adding some “oomph” to updos or textured styles.
- Detail Work: Placing braids, applying hair extensions, or styling intricate updos often requires careful detail work. The rat tail comb’s precision is invaluable for these tasks.
Hairstyles Made Easy
A rat tail comb can help you achieve a variety of looks, including:
- Sleek and Defined: Perfect parts for classic bobs, elegant ponytails, or center-parted modern styles.
- Braided Beauties: From French braids to intricate fishtails, clean sectioning is key.
- Voluminous Updos: Adds subtle lift and structure to even the simplest updo.
- Retro Styles: Essential for vintage looks that require backcombing and teasing, like beehives or pompadours.
Understanding Rat Tail Comb Materials and Their Styling Impact:
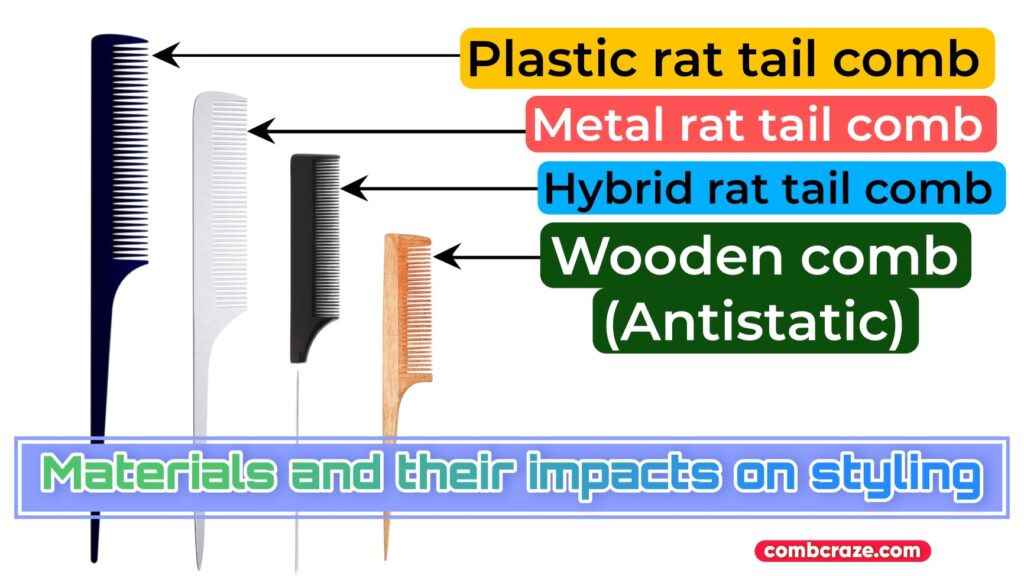
Understanding Rat Tail Comb Materials and Their Styling Impact
- Plastic: The Everyman of Combs
- Pros: Affordable, widely available, good for basic styling on all hair types.
- Cons: Can be less durable, prone to snagging on very textured hair, not ideal for use with heat styling tools.
- Metal: Built to Last and Style with Heat
- Pros: Durable, heat-resistant, creates smooth results, great for precision.
- Cons: Can be heavier, use caution to avoid scratching the scalp, pricier.
- Carbon Fiber: Lightweight, Strong, and Anti-Static
- Pros: Incredibly strong, resists heat, reduces frizz due to anti-static properties.
- Cons: Typically the most expensive option, can be slightly less flexible than plastic.
Beyond the Material: Other Things to Consider
- Tooth spacing: Impacts the precision and suitability for various hair textures (as detailed in the previous section).
- Pintail: The metal tip is a stylist’s bonus tool for detailed sectioning and lifting.
- Handle Design: Some come with texturized grips for better control.
The Bottom Line
- There’s no single “best” material — it depends on your hair, styling needs, and budget.
- If you frequently use heat tools, opt for metal or carbon fiber.
- Beginners can start with a basic plastic comb and invest in a more specialized one later.
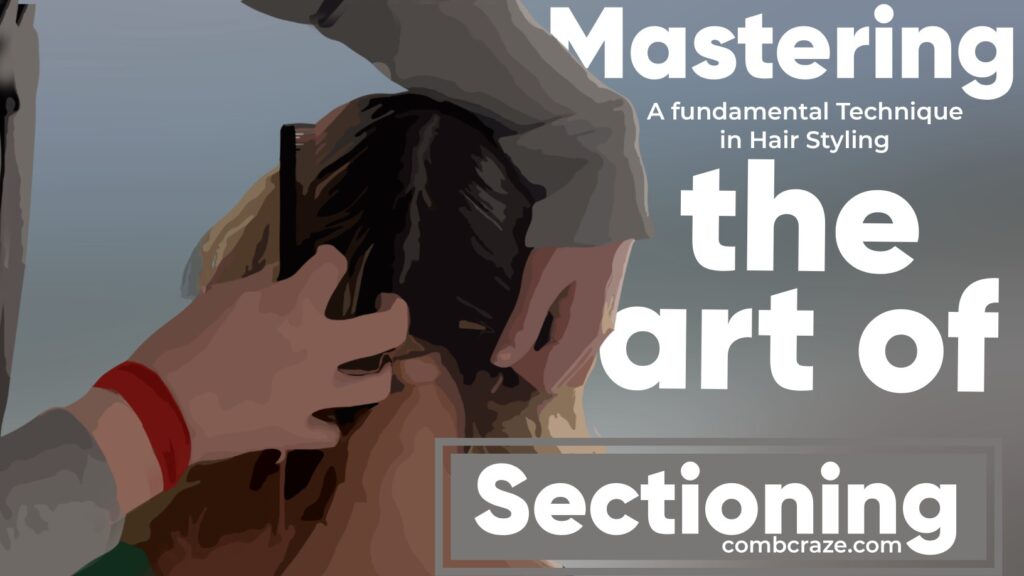
Mastering the Art of Sectioning Hair: A Fundamental Technique in Hairstyling
Absolutely! Here’s a breakdown for a section called “Mastering the Art of Sectioning Hair: A Fundamental Technique in Hairstyling”:
Mastering the Art of Sectioning Hair: A Fundamental Technique in Hairstyling
- Why Sectioning Matters
- Even styling: Ensures product, color, and styling techniques are applied evenly for professional-looking results.
- Control and precision: Essential for braids, updos, and haircuts
- Time Saver: Prevents re-doing sections or mistakes from haphazard styling.
Basic Sectioning Patterns
- The Quadrant System:
- Central part from forehead to nape
- Part from ear to ear, creating four quadrants
- Discuss how to further divide quadrants for complex styles
- Horizontal Sections:
- Used for layered haircuts, stacking volume, etc.
- Emphasize consistent thickness across sections
- Diagonal Sections:
- Create movement and interesting lines in haircuts and styling
- How to work with angles for desired results.
Tips for Clean Sectioning with a Rat Tail Comb
- Slightly Damp Hair: Provides control without being too slippery
- Tension Matters: Keep sections taut, but not painfully tight.
- Follow the Natural Hairline: Avoid creating unnatural angles
- Visual Aids: Include clear diagrams/photos of the sectioning patterns
Beyond the Basics
- Bricklaying: Overlapping sections for seamless blending in cuts and styling.
- Micro-sections: Intricate braids and twists.
- Section Size Impacts Style: How section size plays a role in volume, curl definition, etc.
Practice Makes Perfect
- Start Simple: Master basic sections before complex patterns.
- Use Clips: Secure sections to prevent tangles and maintain organization.
- Don’t Be Afraid to Adjust: Every head of hair is different, refine sections as needed.
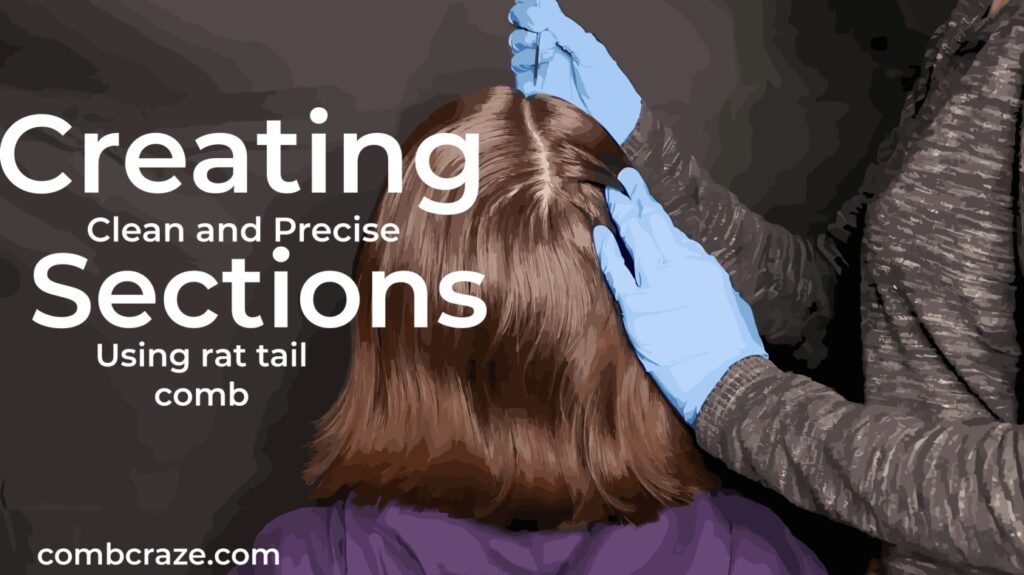
Create Neat and Precise Hair Sections Effortlessly with a Rat Tail Comb
Before You Begin:
- Choose Your Comb: Plastic is fine for starters, a pintail is a bonus.
- Start with Slightly Damp Hair: Dry hair can be flyaway, too wet is slippery. A light misting of water is ideal.
- Detangle: Use a wide-tooth comb or brush to remove major knots first.
Step-by-Step Instructions: The Basic Part
- Find Your Starting Point: Decide where your part will begin on your hairline (center, side, etc.).
- Position the Comb: Place the tip of the rat tail comb at your starting point, holding it like a pencil.
- Draw the Line: Keeping light pressure, gently draw the comb straight back through your hair, following your desired part line.
- Secure and Smooth: If needed, use a small clip to hold the section neatly to one side.
Step-by-Step: Creating Quadrants
- The Central Part: Follow the basic part instructions to divide hair from the center forehead to the nape of the neck.
- Ear to Ear: Starting at the top of one ear, use the comb to create a part across the top of your head to the other ear.
- Neatness is Key: Smooth any flyaways or uneven hairs into your sections
- Clip It: Secure each of the four sections with clips.
how to use a rat tail comb for adding volume through backcombing:
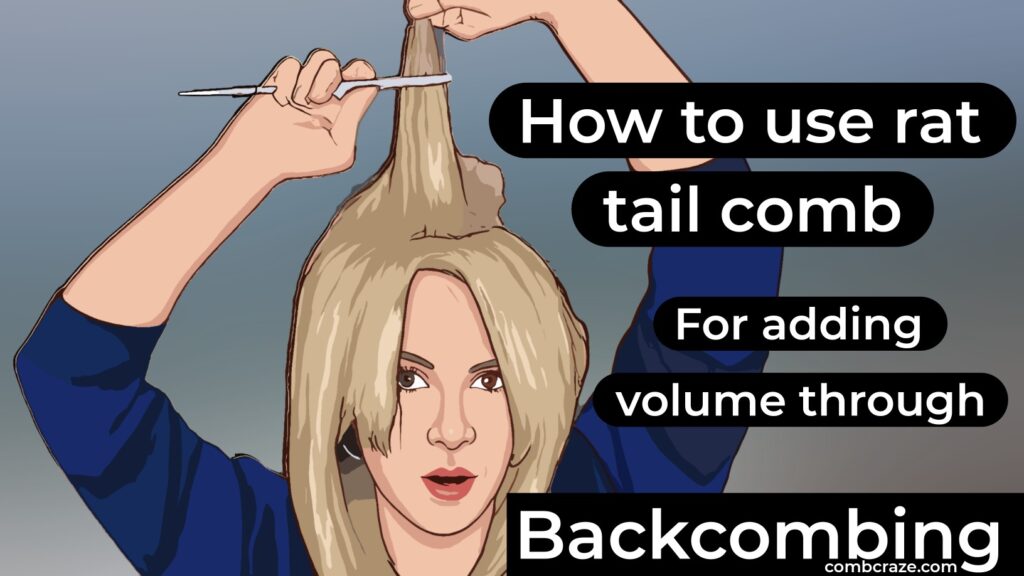
How to Use a Rat Tail Comb for Adding Volume Through Backcombing
What You’ll Need:
- Rat tail comb (fine tooth for precision)
- Hairspray (optional)
- Smoothing brush or comb
Step-by-Step Guide
- Prep Your Hair: Start with dry, detangled hair. If hair is too clean, a light mist of hairspray can add texture.
- Isolate Your Section: Using your rat tail comb, lift up a small section of hair (thickness depends on the volume desired). Hold the section taut, away from your scalp.
- Backcomb with Finesse: Position the comb a few inches from your scalp on the underside of the section. Gently push the comb towards your roots with short, quick strokes. Important: Avoid harsh scraping to prevent breakage.
- Repeat as Needed: Continue on that section until desired volume is achieved. For dramatic volume, repeat in layers within the same section.
- Style and Set: Once satisfied, carefully smooth the top surface of the backcombed section. Secure your style and use hairspray if needed for lasting hold.
Tips for Success:
- Start Small: Backcomb in small sections for more control and precise volume placement.
- The Right Angle: Hold the comb at a slight angle, teeth nearly parallel to the section.
- Support is Key: Gently support the backcombed hair with your other hand for stability.
- Less is More: Start with less backcombing, you can always add more.
- Minimize Damage: Use a gentle touch, and smooth the surface of the hair to hide the backcombing when finished.
Techniques:
- Root Boost: Backcomb sections at the crown for overall lift.
- Ponytail Power: Backcomb the base of your ponytail for a fuller look.
- Defined Updos: Add controlled volume within updos.
Caution: While backcombing is effective, overuse can lead to breakage and tangles. Use it in moderation and incorporate gentle brushing techniques to smooth backcombed sections when finished.
Here are some tips to get the proper amount of tease, without damaging the hair
Tips for the Perfect Tease (Without the Damage)
- Start with the Basics:
- Clean, dry hair is best. Freshly washed hair can be too slippery.
- Detangle thoroughly beforehand to avoid creating knots during the tease.
- A light layer of volumizing spray or texturizer can help add grip.
- Section Strategically:
- Isolate small sections for controlled teasing and precise volume.
- Focus on areas where you want lift (crown, around ponytail, etc.) rather than teasing all your hair.
- Gentle Touch:
- Don’t scrape the comb aggressively against the hair shaft.
- Use short, light strokes towards the scalp, focusing on the underside of the section.
- Listen to Your Hair:
- If you feel excessive pulling or see breakage, stop!
- Fine hair needs a gentler tease than thick, coarse hair.
- The Right Tools:
- A fine-tooth rat tail comb allows for precision.
- A teasing brush is suitable for larger areas and a softer tease.
- Hide Your Work:
- Smooth the outermost layer of the teased section to camouflage the backcombing for a polished look.
- Secure with hairspray for added hold.
- Aftercare:
- Detangle gently: Start at the ends and work upwards, using a wide-tooth comb or wet brush with conditioner.
- Nourish: Deep conditioners and hair masks help repair signs of stress from styling.
Remember: Less is More! It’s easier to add a bit more tease than to tame over-teased, tangled hair.
Using a Rat Tail Comb for Hair Pieces
While a rat tail comb might not directly create a hair piece, it’s a crucial tool in preparing the hair and ensuring the hairpiece integrates seamlessly. Here’s how:
- Precise Sectioning:
- Before attaching a hairpiece, a rat tail comb helps create super-clean sections where the hairpiece will be anchored.
- Zig-zag parts can add more grip for clip-in extensions or wefts.
- Clean Base for Attachment:
- Use the rat tail comb to backcomb small sections at the base where extensions, falls, or wraps will be attached. This creates a textured base for better hold.
- For hair wraps and similar styles, the comb helps isolate tiny, precise sections of hair.
- Blending:
- After applying the hairpiece, the rat tail comb’s fine teeth can gently pull a few strands of your natural hair over the attachment point, camouflaging it seamlessly.
- Styling the Hairpiece:
- Once your hairpiece is in, the rat tail comb helps incorporate it into your hairstyle, creating clean sections for braids, teasing for volume, etc.
Types of Hair Pieces
- Clip-in extensions: Added for length or volume.
- Wefts: Sewn or glued in for semi-permanent fullness.
- Hair wraps/falls: Add color streaks, length, or decorative braids and twists.
- Ponytails: Clip-in ponys for an instant boost.
- Buns and Chignons: Pre-made styles for formal looks.
Important Considerations
- Match the Hairpiece: Choose a hairpiece that aligns with your hair color and texture for a natural look.
- Secure Attachment: Learn the proper technique for the type of hairpiece you’re using to avoid slippage.
- Comb Choice: A pintail rat tail comb is even more versatile for lifting and arranging sections around hairpieces.
Techniques to achieve straight and diagonal pieces with a rattail comb:
Straight Parts:
- Start at the Front of the Room Start from the Front
Start at the hairline or at the front of the head to get straight hair.
- Use a Ruler Technique:
Use the ruler or straight edge along your desired separation line. Use the rattail comb following the edge to create an exact straight line.
- Section Off using Clips:
Clips are used to secure the hair to the opposite side of the piece so that you can have a smooth straight line, free of hairs that wander.
- Divide in Sections:
Divide hair into two sections and create a central part using the Rat Tail comb to smooth the line.
Diagonal Parts:
- Create a Triangle:
Start at the hairline, and then create a straight line towards the crown. This will create an angular section.
- Use Fingers as a Guide:
Let your fingers control the rat tail comb on an angle to achieve a natural and fluid outcome.
- Angle the Comb:
Keep the Rat Tail comb in a slant toward the head for an angled part that is precise.
- Combine Sections
Integrate diagonal pieces into distinct sections to create elaborate styles, like braids, updos, or braids.
- Smooth Transition:
- Make sure there is a smooth transition between straight and diagonal lines by gently merging the lines using the Rat Tail comb.
With these techniques by incorporating these tricks, you can effortlessly get diagonal and straight parts with precision and elegance by using a rattail comb.
How to use the rattail comb for different hair textures
- Straight Hair:
- Sectioning & Styling:
Use a rat-tail comb to create precise sections when styling straight hair.
- Wavy Hair:
- Enhancing Texture:
Use the rattail comb to enhance natural texture in wavy hair. Create defined sections or incorporate textured sections into your hairstyles.
- Curly Hair:
- Parting & Defining Curls :
The rattail comb can be used to part curly hair, define individual curls and give curly hairstyles more structure and control.
- All Hair Textures:
- Teasing Volume:
The rattail comb is ideal for adding volume, lift and texture to hair, regardless of its texture.
- Precision Styling:
- Detailing & Finishing:
The rat-tail comb is ideal for finishing hairstyles and adding details, no matter the texture of your hair.
The rat-tail comb can be used to style and maintain different hair textures. It also enhances the overall appearance with precision and creativity.
You can use a rattail comb for any hair type. Here are some tips and tricks to help you:
Straight Hair:
Use the rat-tail comb to create sleek parts and achieve precise styles.
- Do : Experiment straight styles such as smooth ponytails and straight-down looks.
Avoid excessive teasing as this can make straight hair look flat.
Wavy Hair:
Use the rat-tail comb to define waves.
Do: Use diagonal pieces for a dynamic look.
Avoid excessive backcombing as it can disrupt the natural pattern of waves.
Curly Hair:
- Use the rattail comb to part and define individual curls.
- Do: Use a wide-toothed comb to detangle before styling with the rat-tail comb.
Don’t Avoid creating parts with too much tension to avoid frizz.
General Tips for All Hair types:
- Do: Add volume with a rattail comb.
To maintain control, Do: Clip sections of hair when working in other areas.
- Don’t: Avoid using the rattail comb aggressively at the roots to prevent breaking.
You can achieve a tailored and precise style by adapting the tips to the texture of your hair.
A brief guide to maintaining the cleanliness and condition of your rat tail comb:
- Regular Cleaning:
Do: Cleanse the rattail comb regularly with water and mild soap to remove product buildup.
- Remove Hair Residue:
Do Use an old toothbrush or a fine-toothed comb to gently remove hairs or debris stuck between teeth.
- Avoid Harsh Chemicals:
Avoid harsh chemicals as they can damage the material of your comb.
- Air Dry:
After cleaning, allow the rattail comb to dry naturally to avoid moisture issues.
- Store Properly:
Store the comb away from heat and sunlight.
- Replace if damaged:
Replace the rattail comb if you see signs of damage such as cracked teeth or warping.
- Regular Inspection:
Do: Inspect the comb regularly for signs of wear, and address any issues immediately to maintain its effectiveness.
Follow these tips to ensure your rat-tail comb is clean, functional and ready for hair styling.
It is important for a number of reasons to maintain cleanliness in hairstyling tools.
- Preventing Infections:
Dirty instruments may harbour bacteria which can cause skin or scalp infections, which could lead to discomfort and health issues.
- Healthy Hair and Scalp:
Cleaning regularly will help prevent product buildup. It will also ensure healthier hair and a clean scalp.
- Cross-Contamination Risk:
Sharing tools in professional settings can cause cross-contamination, spreading allergens and infections to clients.
- Enhancing Styling Results:
Clean tools improve the styling results as they prevent product transfer and ensure precision.
- Minimising Allergic reactions:
Regular cleaning reduces the risk of an allergic reaction caused by residues left on styling tools.
- Prolonging tool lifespan:
Regular cleaning can extend the life of hairstyling tools.
- Professionalism, trust and professionalism:
Keeping equipment clean reflects professionalism, and builds trust among stylists, clients, and other professionals.
- Educating Clients:
Stylists must educate their clients about the importance of clean tools for maintaining healthy hair and scalp.
- Conformity with Regulations:
Cleaning in accordance with health and safety standards. This shows that the company is committed to its clients’ well-being.
- Personal Well-Being:
Keep your tools clean to prevent skin issues.
You can use the rattail comb to create trendy and creative hairstyles.
- Textured Braids:
Use a rattail comb to gently tease hair sections before braiding. This will create a voluminous and textured braid.
- Sleek designs for separating the two parts:
Use the rattail comb to experiment with creating intricate and sleek parting designs. This will add a unique touch of style to your hairstyles.
- Retro-Inspired Volume:
Use the rattail comb to backcomb to achieve vintage-inspired volume in the crown.
- Geometric Updos:
Create geometric patterns in updos using the rat-tail comb
- Hidden Braids:
Use the rat-tail comb to create hidden strands in sleek, straight hairstyles. This will add a surprise element.
- Crown Twist Detail:
Use the rattail comb to section and twist hair at the crown. This will create a stylish and detailed focal point.
- Zigzag Ponytails:
Create zigzag parts with the rattail comb, before tying your ponytails to create a playful look.
- Messy Bun Texture:
Tease sections with the rattail comb to add texture, and an air of carefreeness.
- Curved Partings For Waves:
Use the rattail comb to create curving partings. This will enhance the natural flow in your hairstyles.
- Faux Hawk Elegance:
Technique Use the rattail comb to create sections that are precise for a faux-hawk. This hairstyle blends edge with elegance.
These innovative hairstyles incorporate the rattail comb into artistic and trendy hairstyles. They add a touch of creativity and uniqueness in your look.
Here are some tips to help you experiment with braids and twists.
Braids:
- Tip 1: Vary the braid sizes to create a dynamic appearance. Combining small and large braids will add texture and interest.
- Tip 2: Experiment with braid patterns such as Dutch, fishtail or waterfall braids to create different styles.
- Tip 3: Use a rattail comb to precisely section and divide hair, for clean and defined braids.
Twists:
- Tip 1: Combining twists and braids will create a hairstyle that is unique and intricate.
- Tip 2: Experimenting with different twist sizes. Opt for chunky twists to make a bold statement, or smaller twists to add a delicate touch.
- Tip 3: Twist sections to the side of your face for an open and flattering look.
Updos:
- Tip 1:Use the rat-tail comb to create a smooth sectioning and parting for your updo.
- Tip 2: Add twists or braids to updos to add texture and visual appeal.
- Tip 3: Secure the updo with bobby pins or hair pins and then use the rattail comb to refine the style.
Creating different styles with braids and twists can be fun and exciting. It is essential to use the rat-tail comb for precise work, such as creating neat braids or fine tuning details in an updo.
Common Mistakes with a Rat Tail Comb:
- Aggressive Teasing:
– Mistake:
Teasing or backcombing too aggressively can lead to hair damage and breakage.
- Incorrect Parting:
– Mistake:
Creating uneven or crooked parts can affect the overall symmetry of the hairstyle.
- Using on Wet Hair:
– Mistake:
Using a rat tail comb on wet hair can cause increased friction and potential damage.
Solutions and Tips:
- Gentle Teasing Technique:
– Tip:
Tease hair gently and in small sections, starting from the mid-length to avoid unnecessary stress on the roots.
- Use a Straight Edge:
– Tip:
When creating parts, use a straight edge, like a ruler, alongside the rat tail comb for a perfectly straight and even part.
- Wait for Dry Hair:
– Tip:
Allow the hair to dry completely before using the rat tail comb to minimise damage. If needed, use a wide-tooth comb on wet hair to detangle.
These tips will help users avoid the most common mistakes and ensure that they are using the rat-tail comb safely for different hairstyles.
The Ultimate Guide: Key Takeaways
- Precision is key:
Takeaway: The rattail comb is a great tool for precision hairstyling. It can be used to create clean sections or define intricate details.
- Styles that are versatile:
– Takeaway:
The comb is versatile and can be used for many different styling techniques.
- Sectioning Mastery:
– Takeaway
The art of sectioning hair with a rattail comb is essential for many different hairstyles.
- Hygiene Matters:
– Takeaway
Clean and maintain your rat tail comb regularly for maximum hygiene and effectiveness.
Encouragement to Readers
- Encouragement: Try out different styles with the rattail comb. Make it your creative tool for hairstyling.
Rat Tail Combs and Related Styling Products:
I’d recommend checking out these links for rat tail combs and related styling products:
Amazon: https://www.amazon.com/rat-tail-comb/s?k=rat+tail+comb
Roots: https://www.amazon.com/rat-tail-comb/s?k=rat+tail+comb
3 Piece Triple Teasing Comb: https://www.amazon.com/Teasing-Bristle-Brushing-Creating-Slicking/dp/B08K8Y78NJ
2 Pieces Metal Tail Combs: https://www.amazon.com/Cutting-Teasing-Pintail-Stainless-Styling/dp/B0814XGT5C
3 Packs Rat Tail Comb Steel Pin: https://www.amazon.com/Carbon-Stainless-Pintail-Resistant-Teasing/dp/B07PGRX7M5
These options offer a variety of features and materials to suit your needs and preferences.
Further Exploration:
For further exploration on rat tail combs and styling techniques We recommend these resources:
YouTube tutorials: Search for “rat tail comb hairstyles” to find numerous video tutorials demonstrating various styles you can achieve with this tool.
Blogs and articles: Many beauty blogs and websites offer detailed information and tips on using rat tail combs for different hair types and styles.
Social media: Follow hairstylists and hair influencers on social media platforms like Instagram for daily inspiration and creative ideas using rat tail combs.
I hope this helps!